December 7, 2011

"snacks" still life from last night 30"x40"
set up for still life
laying in the objects

a little more detail...
further along (same as first photo)

November 8, 2011

Inspiration... Paintings on Pottery

I've started taking ceramics classes again... and I'm having so much fun! I've thrown a few (very) basic cups, and vessels and have been thinking about how I want to glaze my pieces.

Picasso did beautiful sweeping figurative paintings on his vessels and pottery... how gorgeous!!

Pablo Picasso Picasso *Ewer

Pablo Picasso Yan petite tetes


Pablo Picasso "Trois Personnages Sur Tremplin Sculpture"1956


Pablo Picasso. Hibou (Owl)


Source: picassomio.com via Sara on Pinterest

Picasso holding a large ceramic plate by Pablo Picasso


Source: seveflore.com via Sara on Pinterest

Pablo Picasso Women's Face Edition Madoura


*A ewer is a vase-shaped pitcher, often decorated, with a base and a flaring spout. - source, Wikipedia


July 19, 2011

working on a portrait

Back to work on this portrait of my cousin Cydney..<3 i was scared to work on this for a little while. Sometimes when I like something, i'm afraid to ruin it.. I do like where it's going now. i warmed up the face and slimmed it out a little bit.
 i'm planning on spending some more time on it..

July 14, 2011

Banana Bread and Honey Frozen Yogurt

This banana bread turned out delicious! I used this recipe from SimplyRecipies.com, with some altering. (Instead of all purpose flour, I used 3/4 c. whole wheat and 3/4 c. brown rice flour, also I added 1/3 c. of roasted sesame seeds.)

Ingredients
  • 3 or 4 ripe bananas, smashed
  • 1/3 cup melted butter
  • 1 cup sugar (can easily reduce to 3/4 cup) *i used 3/4 c.
  • 1 egg, beaten
  • 1 teaspoon vanilla
  • 1 teaspoon baking soda
  • Pinch of salt
  • 1 1/2 cups of all-purpose flour *i used 3/4c. whole wheat + 3/4 c. brown rice flour
  • *plus 1/3 c. roasted sesame seeds
Preheat the oven to 350°F (175°C). With a wooden spoon, mix butter into the mashed bananas in a large mixing bowl. Mix in the sugar, egg, and vanilla. Sprinkle the baking soda and salt over the mixture and mix in. Add the flour last, mix. Pour mixture into a buttered 4x8 inch loaf pan. Bake for 1 hour *i took out at 50 mins). Cool on a rack. Remove from pan and slice to serve.
Makes one loaf. 
For the honey frozen yogurt I looked up several recipes online, and they were very similar. So, i just kinda improvised. next time around I would add some lemon juice, use a little less honey, and add a little sugar. also, this would be good with small pieces of candied nuts!

Ingredients
  • 3 c. Greek Style Yogurt (strained with cheese cloth in fridge for a few hours to get rid of excess liquid)
  • 1/3c. honey (or to taste)
  • 1 tsp. vanilla
  • 1/4 c. toasted pine nuts (or to taste)
Combined strained yogurt, honey and vanilla chill. Use ice cream maker as directed. Stir in nuts after removing from ice cream maker, freeze or serve!

I drizzled honey, sprinkled sesame seeds and added a mint leaf before serving.

July 12, 2011

experimenting

lemons and blue pitcher
 It's been an experimental month for oil painting around here. the painting above was started on a red-painted canvas, which i think inspired the bold and loud colors and feeling of the painting. it was fun to paint, i like the size and roundness of the pitcher in front of the lemons.

I spent some time using a palette knife to apply paint, which is extremely fun. it seems that once i start applying paint with a knife, i have to continue with a knife. i have not been successful using a brush on top of the knife applied paint (yet). the three paintings below were started with a brush for laying out the forms and then continued and finished using various palette knives.

pink flowers 
kettle with red background

kettle with blue background
  
potted succulent

 i'm not sure how i feel about the painting of the cactus/succulent plant above. I do like that i'm experimenting. here, after initially laying out colors and form, I scrubbed on and off paint to create interesting color areas.. hmm...

flower bouquet -work in progress
the flower bouquet above is just starting out.. not sure where i want to go with this. i started by painting the whole canvas red-orange which i think helps the painting progress quickly, because there is already color and inspiration waiting for you on the canvas!

we shall see... :)

June 23, 2011

wonderful wedding dresses...

With a few friends getting married in the next 6 months, I was in the mood to look at some wedding dresses.. these are by Monique Lhuillier and they are gorgeous........

outrageous!!


April 3, 2011

American artist Viginia Lee Burton

illustration from The Little House by Virginia Lee Burton, 1942
I just finished watching an interesting documentary on late artist and illustrator Virginia Lee Burton on WHYY Philadelphia, "A Sense of Place" (here is the site for the movie). The program, with commentary from her sons, family friends and other artists talks about the life and work of Virginia from childhood in New England, to CA to Gloucester, MA where she lived most of her life. She is best known for her children's books and also worked in decorative and textile arts.

The Little House, 1942

Choo Choo, 1937

Mike Mulligan and His Steam Shovel, 1939

Calico the Wonder Horse, or the Saga of Stewy Stinker, 1941

Life Story, 1962

As the founder of the Folly Cove Designers (founded in 1940), she taught lessons in printmaking and design to neighbors. The collective grew and its work was sold in retail locations, and featured in magazines. Today work from the Folly Cove Designers can be found in museums including the Museum of Fine Arts, Boston.
"Fish Story", 1957

"Reducing"


Here is a link to a cute and informative pdf of a pamphlet for children including some of Virginia's design philosophies from Cape Ann Musuem.
I would love to buy some of her beautiful children's books and prints some day!

(images from landofnod.com, amazon.com, capeannhistoricalmusueum.org)

March 3, 2011

florida sunset

ahhhh......  we had a nice trip!  and now, back to reality! <3


February 15, 2011

some inspiration..

camilla engman


camilla engman

camilla engman

 http://www.camillaengman.com/


christine lafuente


christine lafuente


christine lafuente

christine lafuente


http://christinelafuente.com/

alex kanevsky

alex kanevsky
http://www.somepaintings.net/Alex.html
<3

our headboard diy

our finished headboard

We finally finished upholstering and covering the headboard for our master bedroom. For this project, i came up with the design and sourced the materials, and ryan pretty much took the lead on the production end (my little handyman)! We wanted to go with a camelback shape and decided to use a creamy-beige fabric with damask pattern.

headboard diy in process
We found a great headboard on craigslist for $35, to use as our frame. Since the headboard had some open lattice design, we used a hard-foam to fill the open areas and make the headboard one flat surface. We also cut off the spindles to get the shape we wanted.

We then laid the headboard on our two-inch foam padding and traced the shape, then cut the foam with a mat knife and scissors. We have a great discount fabric store here, Jomar where we purchased the foam for about $6 a foot. (We couldn’t believe that at another retail store two-inch foam was almost $60 a yard!!!)


To add an additional layer of padding we wrapped the two-inch foam and headboard in a soft moving blanket we had around the house, and secured it with staples via electric staple gun.  I’ve seen people use quilt batting here instead of a blanket, but we decided to use the supplies we had.

Next, we wrapped and fitted the fabric, which was actually left over from a curtain project we did last winter (and also purchased at jomar). The trickiest part of this project was making sure the fabric was lined up nicely. We took our time as we slightly stretched the fabric and stapled it, kind of like stretching a canvas, but with less tension.
 
Supplies purchased:
Headboard frame $35
Hard foam about $20
Two inch foam $48

Supplies found around the house:
Fabric
Blanket or batting
Hand saw, scissors, mat knife, staples, and staple gun

We are still working on the furniture layout of the room.  For now, it look like this and we like it!

our master bedroom with headboard


Some direct and indirect inspiration for our headboard:
source unknown

"Katie Leede & Company"

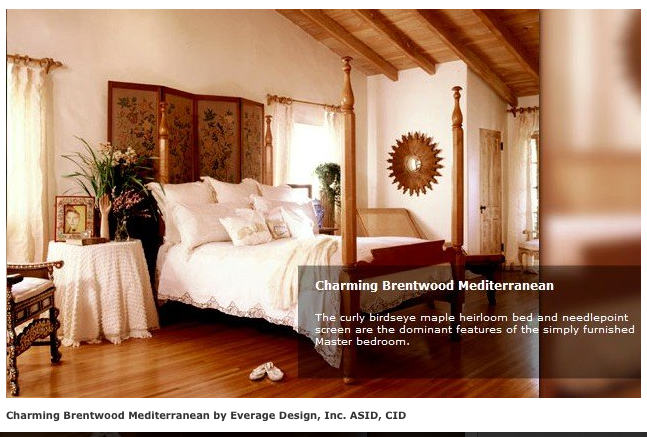
"Everage Design, Inc."

"Mindel & Associates"

"Kristen Buckingham Interior Design"
"Katie Leede & Company"


<3